Magento 2 Installation Guide
Follow these steps to install Magento 2.
Step 1: Download Plugin
If you haven't already, download the plugin here.
Step 2: Install Plugin And Setup Integration
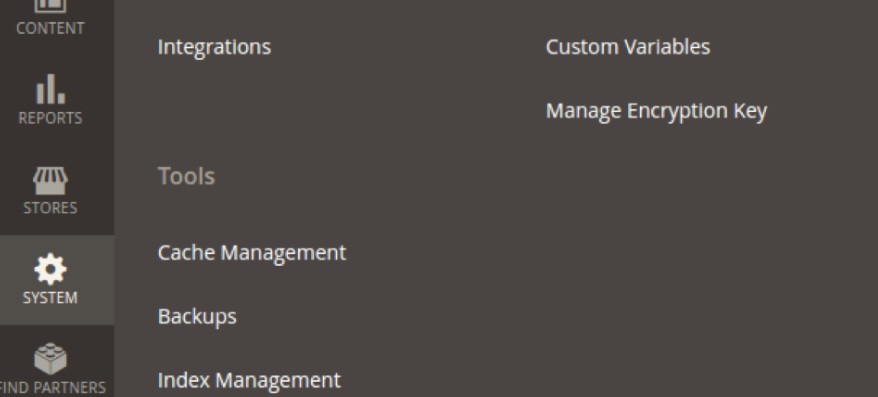
Login on your Magento 2 admin and go to System > Integrations.

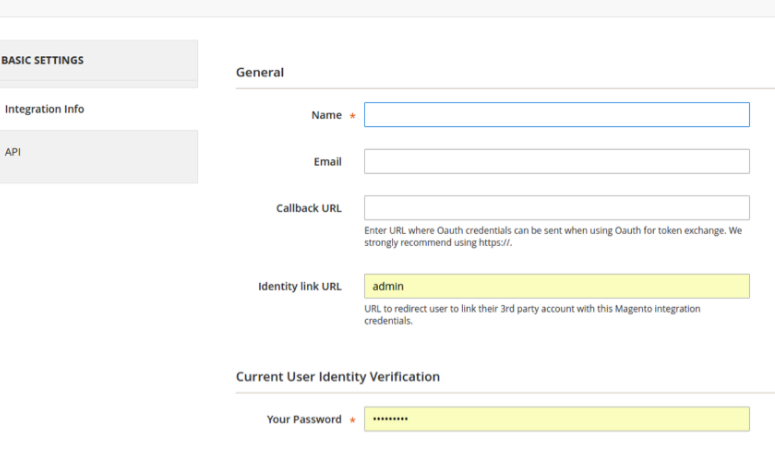
On the integrations panel, click Add new integration. Under the Integration info tab, fill in just the Name. Email, callback URL, and identify link URL are not necessary.

Click on the API tab in the side menu and select All for resource access. Then click Save.

When you get back to the integrations list, Click Activate under the new integration you just created.

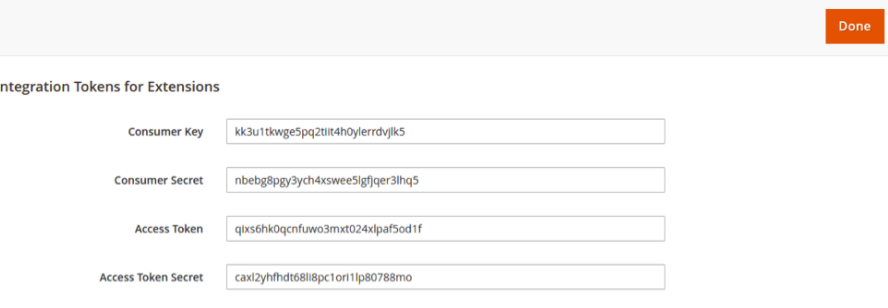
On the popup that opens up, click Allow. You’ll get redirected to a page like the following. Copy and send us the four keys you see on that screen.

Step 3: Create ShipHero Account and Add Magento 2 Store
- Go to www.shiphero.com and signup or login to an existing account at https://app.shiphero.com/account/login
- Add Magento Store
- Navigate to My Account > Stores
- Click the Add New Store button and select Magento 2
- Fill in the following fields:
- Store URL - The full URL to your store including "https://" at the start and with no trailing slash at the end of your URL. For example, you could enter "https://www.mystore.com" but not "https://www.mystore.com/".
- Consumer Key - Copied from Magento
- Consumer Secret - Copied from Magento
- Access Token - Copied from Magento
- Access Token Secret - Copied from Magento
- Choose whether to allow ShipHero to Manage your Magento Inventory:
- If checked, your inventory is managed through ShipHero, meaning that when inventory is update in ShipHero, it syncs it back to Magento.
- If you’re testing ShipHero and still have another shipping solution enabled, you can leave this unchecked. Don’t worry, you’ll drop that other solution soon enough!
Once you click connect, it may look like nothing is happening at first. This is because the system needs a few minutes to download all your products and orders from Magento.
